Version Control with Git and Github
What is Version Control?
Version Control System (VCS) is keeps records of changes made to files/files over time. Using a VCS enables us to revisit and/or restore older version of files, in case we made a mistake or even if we need to revisit our thinking as a process progressed. Think Google Docs.
Understanding Git
Git is a widely used VCS. A git project stores changes in a local repository. That is, snapshots with metadata and how the folder system with its files looked like at a particular moment of time looked like is saved locally on your computer.

Git is a local system (mostly). No connection to a server or internet is needed to access older snapshots. Not just the older version of files, but details of the changes are recorded locally and can be accessed with locally available git commands.
The Three States
The key to understanding a git project is to develop clarity about the three states it holds the file in.
1- Modified: Any changes you make and save. Think, saving a word doc.
2- Staged: Any saved changes are offered or assembled on a table to git.
3- Committed: The staged table is deposited or committed to local git repository.
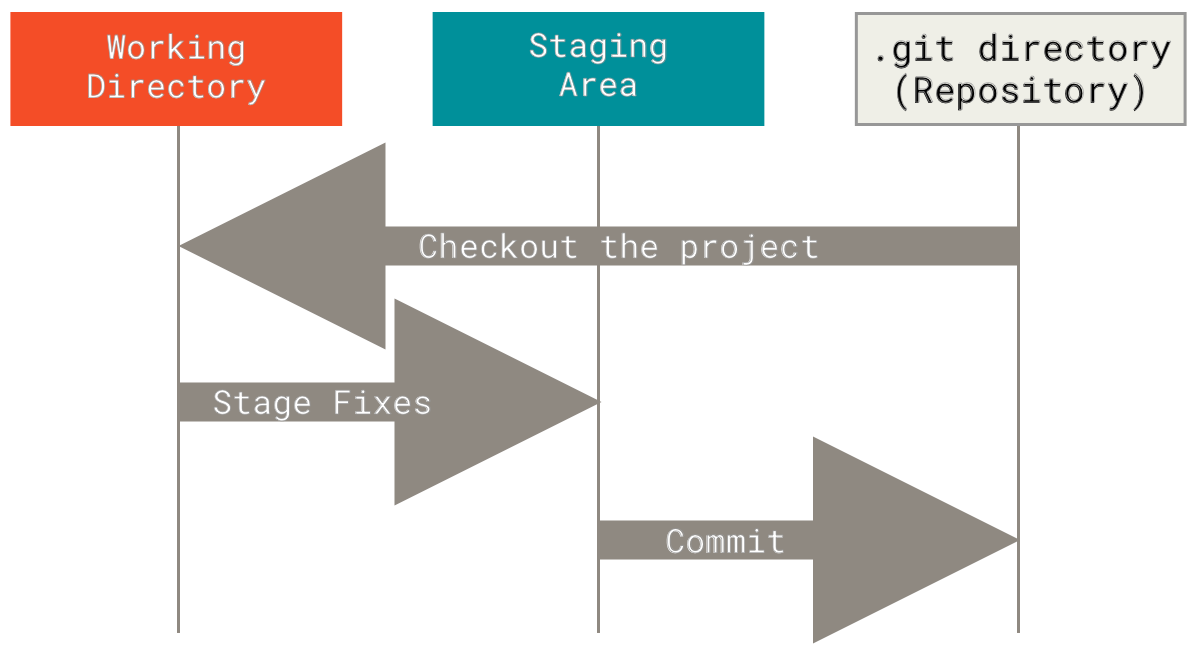
The working tree is a single checkout of one version of the project. These files are pulled out of the compressed database in the Git directory and placed on disk for you to use or modify. This is the case when you pull file/s from online reporsitory
The staging area is a file, generally contained in your Git directory, that stores information about what will go into your next commit. Its technical name in Git parlance is the “index”, but the phrase “staging area” works just as well.
The Git directory is where Git stores the metadata and object database for your project. This is the most important part of Git, and it is what is copied when you clone a repository from another computer.
The basic Git workflow goes something like this:
1- You modify files in your working tree.
2- You selectively stage just those changes you want to be part of your next commit, which adds only those changes to the staging area.
3- You do a commit, which takes the files as they are in the staging area and stores that snapshot permanently to your Git directory.
Using Git
We use command-line program called Bash to run git on computer. This essentially means using Terminal on macOS and Git Bash on Windows.
MacOS: For mac, open terminal and type git. If a list of commands shows up, you have git installed. Else, download and install using the link here.
Windows: Install using the link here. Check all default installations. If installed correctly, upon right-clicking in any folder you should see open terminal here.
Detailed instructions on installation here
We need some basic bash commands to get started:
pwd: prints working directory.
ls: lists all the files in the working directory.
cd: changes directory.
mkdir: Makes a new directory.
Try these commands in Terminal/Bash on your systems.
Git commands
Commands for git(or any program) start with name of the program. Try the following commands:
git status
git log
You can also using terminal/bash from RStudio. Look at the second button at the bottom left, next to console. It automatically shows bash in the working directory of your project.
Local Git Workflow
Git workflow is anchored around repository. A repository is a folder where files including data, scripts, and other files are stored along with git log.
In our workflow, this should ideally be the folder where .RProj file is located.
Let’s practice using an existing folder with scripts and data.
1- Open an existing R project. If not available, start a new R Project using File>New Project.
2- In the terminal window of Rstudio, type pwd to see of the correct working directory is opened.
3- Type git init. This initializes the git repository for the project. This step needs to be done only once per folder.
4- Tell git which files are to be tracked and then staged. Use git add followed by filename or tab to add a few files one by one.
3- Once added type git commit -m "first commit". This takes a snapshot of staged file/s. ** Do not forget the -m**.
4- Use git status and git log to see outputs about the process.
- Repeat this process after modifications to any script.
As a norm, avoid hosting raw data files like .csv, .dta, or .xlsx on GitHub. Large or sensitive files should be listed in a .gitignore file to prevent accidental upload. Git is best suited for tracking code and small plain-text files.See more on .gitignore here.
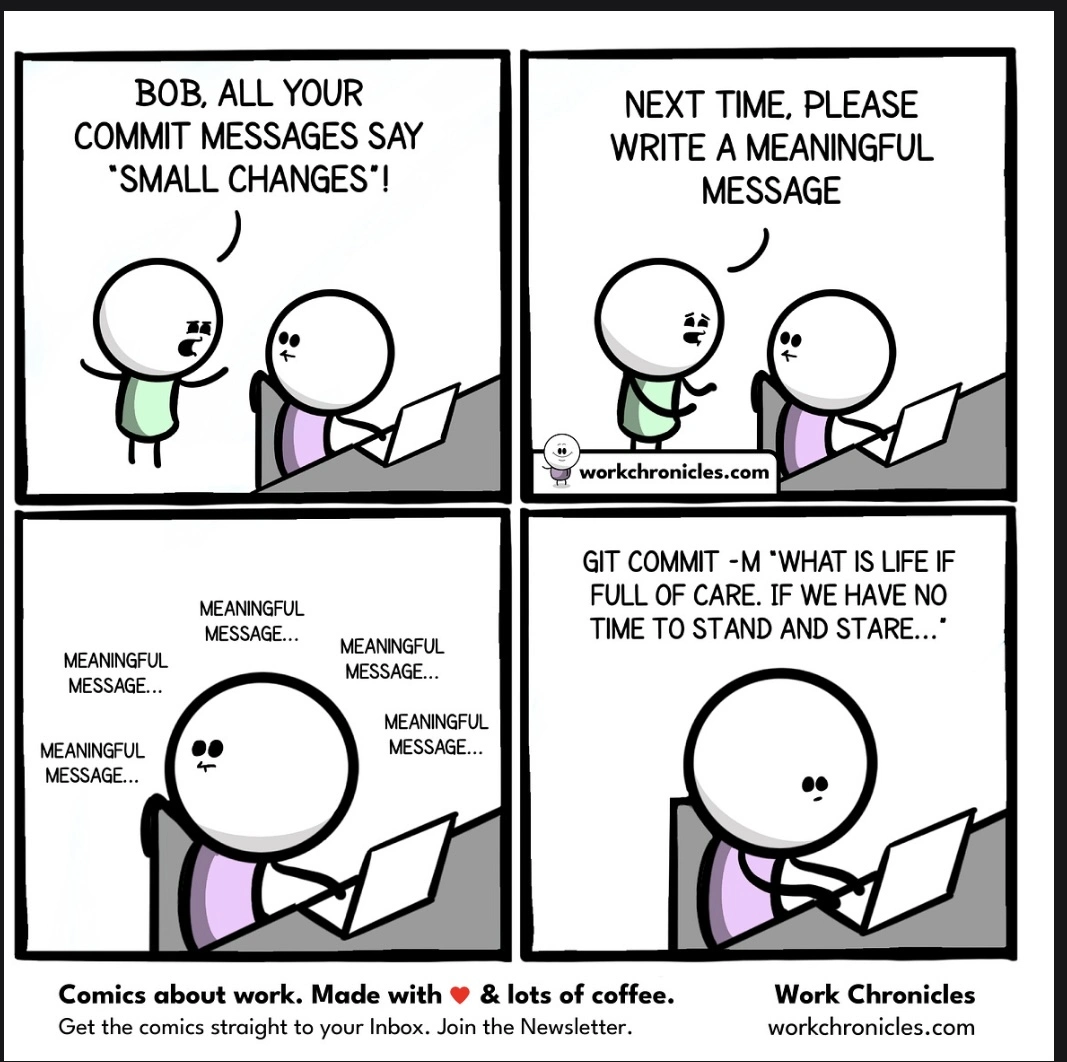
Similar to comments in R codes, commit messages should also ideally be brief phrases explaining contextual change rather than being detailed messages.
Using Github
Github is an online hosting service for git based VCS. Git and Github are often confused with one another. It is important to remeber how they are different and that they complement each other.
The most common workflow involves creating and modifying files locally,intializing local git repo (git init), staging files (git add) and committing changes with an informative message (git commit -m"<message>") to local git repository, and then push changes to Github.
Make you account on Github if not already done. Ideally, use personal email id to register.
Make a new RProject on your computer as we had done previously. Name it
my-git-practice.Download and place the
000-setup.Rin the folder.Run the R Project file, if not already done. In the opened Rstudio window, go to terminal at the bottom and check with
pwd. Then rungit init.On Github.com homescreen, click the green
Newbutton on top left corner.Call the new repository
my-git-practice(same as local repository). Don’t make ay other changes on this page. ClickCreate repository.Copy the code under …or push an existing repository from the command line. Note: If you’re using an older version of Git or RStudio, your default branch may be master instead of main. You can rename it later or use git branch -M main.
Paste it in the terminal window of Rstudio and press
Enter.
fF any issues pop up here, resolve by talking amongst yourself or google.
Refresh the github.com window.
Run
git add 000-setup.Rin terminal. (Staging state)Run
git commit -m "setup file added"in terminal. (Committing state)Run
git pushin terminal. This pushes the local changes from repository to remote (online) repository.
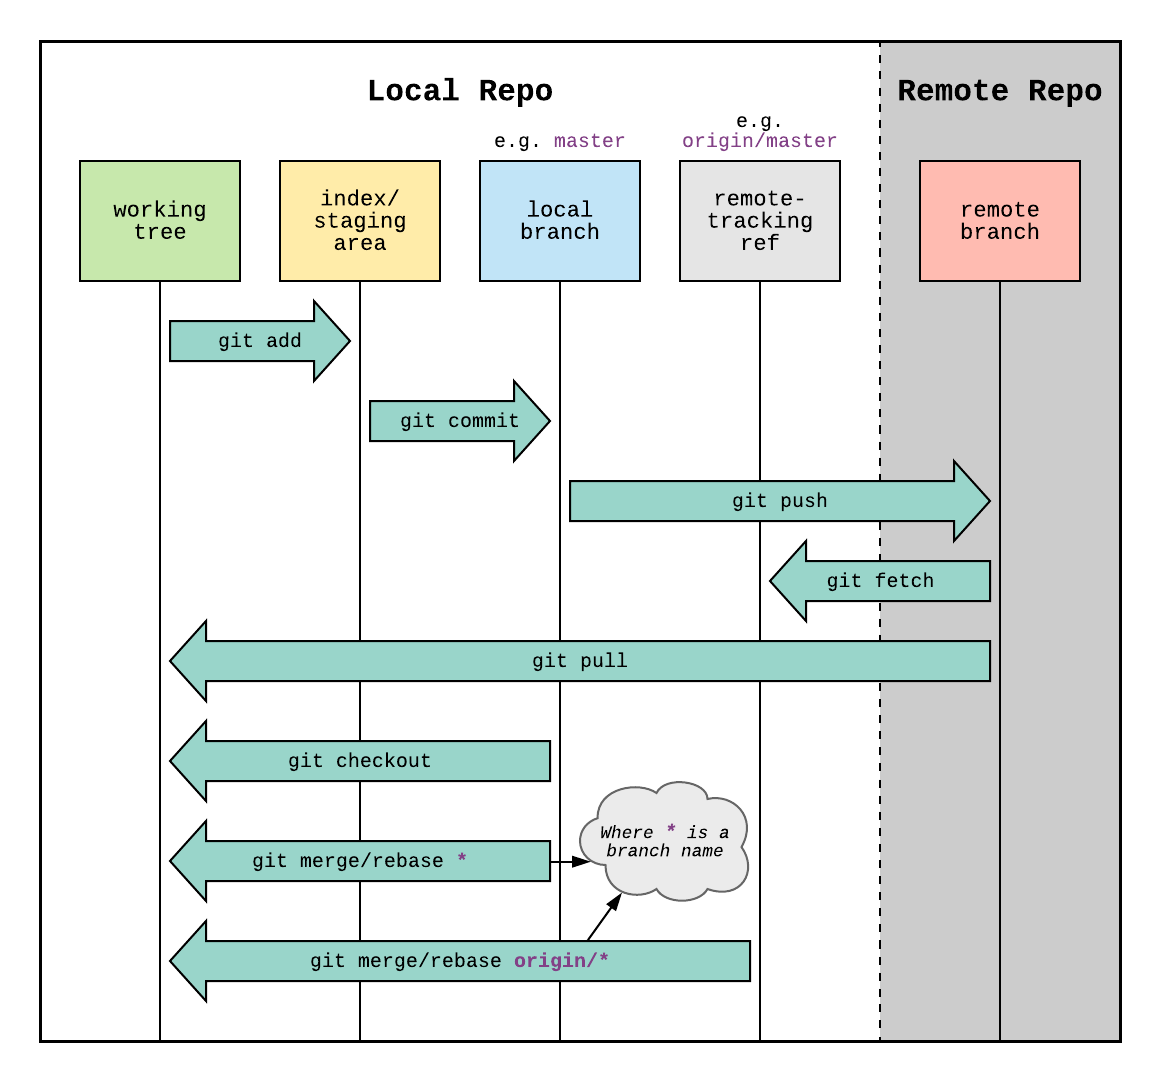
While git is used for version control, Github is additionally used for collaborative work. We are not covering branching and collaboration today. Links below can help you with starting these at later stages.
In addition to git functions, Github adds similar but additional stages. Compare the following flowchart to one in section on understanding git.
Additonal Resource
Git Documentation
Advanced Git operations tutorial
Git Cheatsheet